One of the big Autumn/Winter Trends this year is the Bomber Jacket, or Flight Jacket. As soon as I saw these styles walking down the catwalk it went straight onto my “to-sew” list!

Read the full Autumn Trends blog here.
There are a few different options of sewing pattern available for this style, but I have always had a soft spot for Trend Patterns so choosing the pattern was easy. “The Bomber” sewing pattern is oversized, with added volume in the sleeves created by pleats at the elbow and options for adding extra pockets and zips. It is very similar to the style seen at Isabel Marant.
As soon as the Cosy Quilted Puffer fabric arrived I knew instantly this was the perfect fabric. This fabric is pre-quilted and looks the same on both sides, so there is no need for a lining. The pattern does come with lining, so I had to have a good think about how I would finish the insides.

Cosy Quilted Coating Fabric (still available in Old Rose) and See You At Six Ribbing in Duck Green
The easiest option would be to overlock all the seams, but I felt like this was a make that deserved a little more love and attention. The Bomber jacket is a trend that has returned year after year, so I knew this would be a piece I will be using for a long time.
I opted for bias bound seams in the end and used an Ex-Designer cotton sateen (the same fabric I used for my Trend Patterns 70’s dress).

Ex-Designer Paisley Dream Cotton Sateen

I cut the fabric into 4cm strips on the bias and used a bias tape maker to iron it into double fold bias tape.
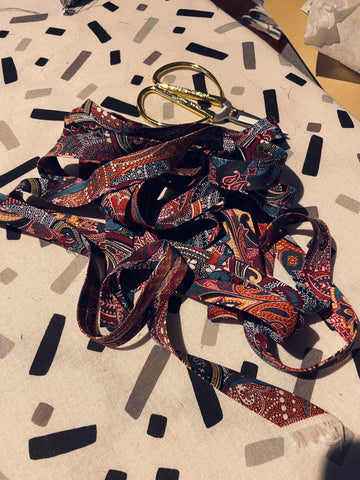
I needed a lot of bias tape!
The process of binding all my seams really made me slow down and think about each step, instead of rushing through this project. I took into consideration the order each seam was put together and if it would be best pressed open or together.


I used binding to finish the edge of all pockets and along the zipper opening. The only areas I overlocked were the edges attached to ribbing as this would need to retain the stretch.
For the side seams and sleeve seams I added the binding to each piece individually first and then sewed the seams together. For the armscye I sewed this seam together first and then attached the binding.
My duck billed or applique scissors came in very handy for this process as it made trimming the seams a breeze.

You can see the process of binding the seams on our Reel on Instagram or Short on YouTube.
In the few weeks since I have made this jacket it has got so much wear. It is nice a lightweight without the lining but still super cosy. I can wear it under a coat and still feel comfortable.

Sharlene’s blouse is made in our Autumn Tapestry Rayon/Viscose

It also pairs with a lot of my makes, from jeans and a shirt to floral dresses.

I am wearing the jacket with my ‘Autumn Blooms’ self-drafted dress here (fabric sold out).
Given how much I have wore this jacket already I am so happy I took the time to make it pretty on the inside. When anyone comments on how much they like my jacket I take great pleasure in flashing the insides and saying “Thanks! I made it!”. I feel that sewing a jacket is an investment and something you want to get a lot of wear from, so taking this extra time to make it special is worth it.
Keep an eye out on our Instagram and YouTube for more seam finishing techniques.